Learn How to Safely and Efficiently Lift Heavy Products with a Mini Excavator
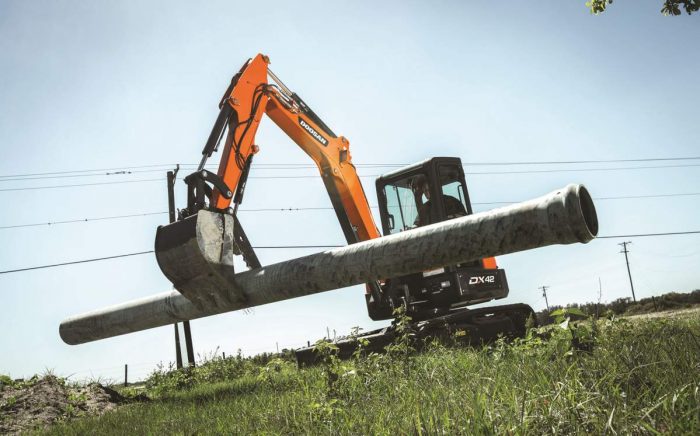
They were designed to dig, but as is the case with many well-engineered machines, mini excavators can also save contractors time and money by pulling double-duty as lightweight cranes or material handlers on jobsites. Lifting heavy items safely and efficiently means both contractors and operators alike need to know the specifics of the machine being used and understanding how to get the best performance out of it with minimal risk to workers and less wear and tear on its components. Pretty much anything is fair game for lifting with a mini excavator on a jobsite today, says Dave Donneral, specialty machinery manager with Kobelco USA.
“We see our customers lift a variety of items, including landscaping items such as rocks, curbs, wood beams, trees, as well as infrastructure items like water boxes, pipes and sewer connections,” Donneral says. “They can also help on site cleanup and recycling operations by moving scrap metal and concrete, and they’re even used to just easily move tools around jobsites — things like jackhammers, walk behind plate compactors or other tools and attachments.”
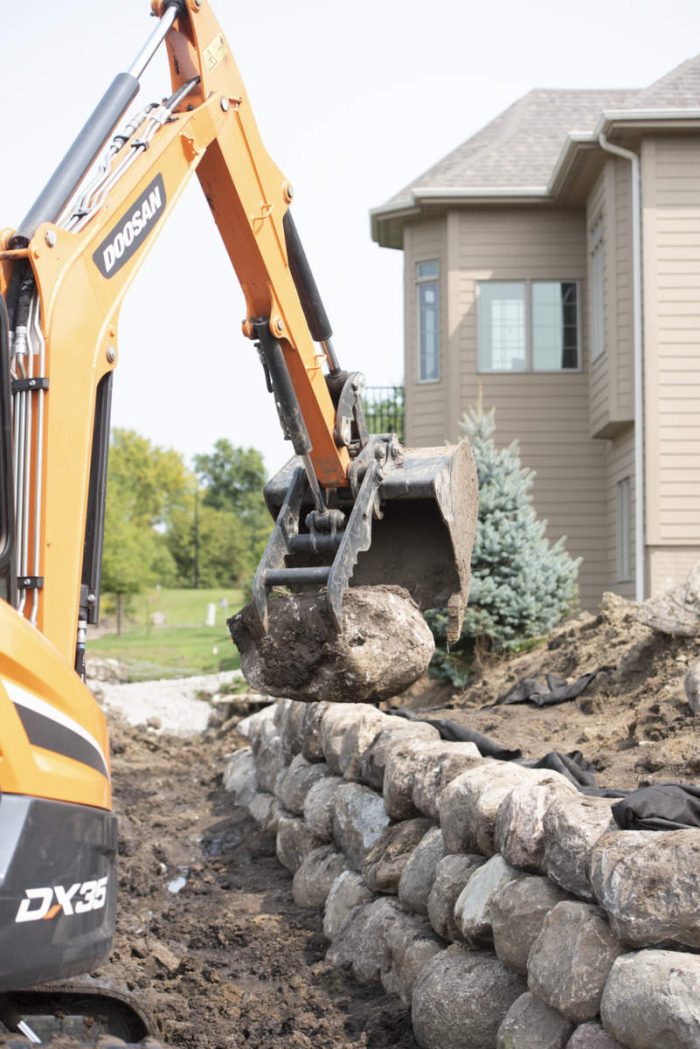
“The dynamics of a mini excavator provide a good, stable base to lift and move materials on a jobsite,” confirms Aaron Kleingartner, product and dealer marketing manager for Doosan Infracore North America, “and to help our customers, we provide our mini excavators with a host of lifting-specific accessories and add-ons.”
These include quick couplers with an integrated lift eye and a robust hydraulic system that can handle a wide range of lifting attachments such as grapples, clamp buckets, vacuum systems (for pipes or concrete slabs) or mechanical clamps for moving curbs or barriers.

“These machines have a lot of inherent lifting capability,” Kleingartner says. “Even if you take the bucket off when you’re using the lifting eye, there is a lot that operators need to know about lifting — from how far away from the machine the load is to how the machine is set up and positioned, as well as how high you need to go. Those are just a few of the basic considerations that a good operator is thinking about before they begin to move or lift materials.”
Raise Your Game with Attachments
As lifting applications become commonplace with mini excavators, a host of specialized attachments have come to market specifically to make moving materials quicker and safer on the jobsite. Grapples and buckets with hydraulic thumbs are the most basic lift-focused attachments for mini excavators and can be used to lift items that are secured by the clamping force of the auxiliary hydraulics. Consider mini excavators may have one-, two- or even three-auxiliary circuits, allowing added hydraulic functionality like using a simple thumb or perhaps a high-tech grapple with tiltrotator. As mini excavators grow in size (they are measured in metric tons or tonnes), the more advanced their hydraulic systems, attachments and lift capabilities become (5- to 6-tonne units are great lifters for instance).
Lifting attachments as a category is broad for mini excavators, and each category could have its separate story. Example: Here’s an article on thumbs:
Here’s another one on tiltrotators:
Each attachment style will require a deep dive, but there are lots to choose from. There are low-tech lifting hooks or lifting eyes on buckets and booms, and couplers or grapples can be used in conjunction with slings, cables and chains. Just make sure that they are securely attached to the item being lifted and the machine lifting point. Thumbs are super common and helpful. Your basic choices include two main categories: rigid or hydraulic. The hydraulic thumb (often preferred for its versatility) connects to the machine at the base of the arm and includes hydraulics to precisely control the position of the thumb, which could have multiple tines or on something super specialized, the ability to rotate.
Grapples run the gamut too and get cooler and more specialized for bigger excavators. On the mini side, there are general clamps, three-tine grapples or clearing grapples. Everyone likes to use different names. The bigger grapples or clamps include specialized variants in logging, waste and pipes. What’s really hot right now are rotating coupler attachments and safety quick-coupler systems that allow enhanced use of grapples and lifting attachments. Dig that article above on tiltrotators. Here’s another high-tech alternative. Vacuum lift attachments (we’re thinking of Vacuworx specifically here) are a great way to quickly pick up items such as pipe and concrete slabs that have a consistent, smooth surface for the vacuum to adhere to and maintain contact with during the lift.
According to Tyler Hall, production manager at Vacuworx, safety is the main reason many contractors opt to use vacuum lifters with mini excavators.
“Chains, hooks, slings and rope are prone to failure,” he explains. “Vacuum lifting provides a powerful positive engagement to the material being moved, unlike chains or slings, which can slip. Additionally, when a load is in place and needs to be released, it can be done while keeping workers out of the immediate area and out of danger.”
Another advantage vacuum attachments have is speed, Hall says. “The precision afforded by vacuum attachments eliminated re-work and manual handling of materials, and less manual interaction means less time between lifts and great productivity all around.”
Many things can be lifted, product managers say, but you need to make sure that whatever the load is, it is being held securely so it won’t fall or get damaged during the movement and lift. To do this, ensure that the full load, including any buckets, couplers, thumbs, shackles, cables and slings, as well as the load itself, does not exceed the lifting capacity and working range of the manufacturer’s lifting chart. Also make sure that the lifting point itself is rated to carry that load. Always use the recommended lifting point that the manufacturer provides as per the operator’s manual. Now, let’s get more depth into lifting basics with a mini excavator.
Details Matter
Jobsites are hectic places. So, there’s always a natural inclination on the part of production-focused workers to work fast, and that’s exactly what operators do not need to do when preparing to lift items with a mini excavator, says Justin Steger, solutions marketing manager, site development and underground with John Deere. He says operators should always consult the operating manuals, guides and maintenance inspection checklists to identify any potential problems prior to machine operation.
“That said, operators should place the machine on stable, flat, firm ground and as far back and as safely as possible from any edges or drop-offs,” he advises. “Additionally, before beginning tasks, it’s good practice to test lift the load slightly off the ground to see how the machine reacts then continue using slow, smooth commands of the hydraulic functions to maintain control of the load.”
“Always review the manufacturer’s lifting charts and understand them,” Donneral adds. “If the chart does not include a bucket, then you need to include the bucket weight into your total load calculations. If the machine has a dozer blade or different boom/arm options, make sure you are looking at the correct chart. Know the total load weight [including bucket, coupler, thumb, etc.] and ensure that weight does not exceed the manufacturer’s lifting chart anywhere in the working range where you will be lifting/swinging the load or, preferably, that the weight does not exceed any point on the lift chart. Remember that the machine may have a lower rating over the side than over the front.”
Donneral says that all mini excavator manufacturers provide lifting charts and have them available either on the machine, in operators’ manuals or on spec sheets. Make sure your operators understand that lifting capacity is calculated in compliance with ISO safety standards.
“Lifting capacity is a calculated number that does not exceed the hydraulic capacity or tipping load for safety,” Donneral adds. “If the manufacturer indicates that the machine is ‘hydraulically limited’ at a specific point [usually indicated by an asterisk] then the machine may be mechanically stable at that point, but the pressure in the hydraulic system may not be capable of operating in that position and the cylinders may either extend or retract causing the load to drop.”
Mini excavators are making big waves on jobsites all over North America. Click here for the latest news on these machines and the companies that make them.
Operators also need to understand that the machine configuration will affect lift ratings. For instance, operators can maximize lift capacity and take on heavy-duty jobs by adding optional counterweights to a compact excavator. Note that zero and reduced tail swing configurations may not lift as much as conventional tail swing units.
“Additional weight of a cab versus a canopy will affect how the machine lifts,” Steger explains. “The length of the boom and arm will also significantly impact the lifting rating and performance of a machine. If a machine will be lifting heavy objects frequently, consider a machine with a standard or short arm rather than a machine with a long arm. Keeping the load closer to the excavator will allow it to lift more weight while maintaining better stability. Place the backfill blade on the ground when lifting.”
“Think of the machine like a teeter-totter, and the front idlers of the tracks are the tipping point,” Steger says. “The closer the load is into the tracks, the more the excavator can lift. The further out the load is, the less the excavator can lift before becoming either hydraulically or stability limited.”
This point is important, Steger adds, because when lifting over the side you’ll have less weight spread out over less ground, since tracks are generally longer than they are wide on most machines.
“Lifting over the side will have reduced lift capacities compared to over the front,” he says. “Additionally, make sure that if the mini excavator has a retractable undercarriage, it is positioned in extended or widest position possible for the most stability, and always remember to put the backfill blade down for even more stability during a lift.”
Bear in mind that the lifting point is usually considered to be at the excavator arm tip, not the physical load itself. The machine’s lifting point is calculated as the vertical height from the bottom of the tracks (usually ground level), and horizontal distance from the center of the turntable of the machine.
“For example, if the end of the arm tip is 6 ft off the ground and 10 ft out from the center of machine when you begin to lift, that is the position on the lifting chart you need to start with,” says Steger. “Then, you will need to look at all the positions that the arm tip will be in from when you lift the load until you place the load, and ensure your load is less than the weight in the lift chart. If you exceed that weight, you must consider changing the lift plan, lightening the load or using a larger machine.”
Finally, Donneral notes, as the operator reaches further from the machine, lifting capacity decreases. If the machine has a long arm option, it is capable of reaching further, but at that maximum reach the total lifting capacity is usually less than a standard arm. The geometry of the boom and arm changes depending on how the machine is configured and extending too far in those situations can make a machine unstable before an operator can react and return to a safe configuration.
But the good news if that patience is practiced, and load charts are consulted and faithfully followed, mini excavators can help contractors power through their days by moving both dirt and materials up and out of the way for progress.
Jack Roberts is a freelance writer with Compact Equipment.
For reprint and licensing requests for this article, please click here.