Getting the Most from Your Equipment
 The most important operational technique to making your hard-working equipment last is to incorporate extensive preventive maintenance and inspection programs into your regimen. These programs must be performed on a regular schedule (as per the manufacturer’s recommendations, minimally) and by a qualified technician. The inspections will range from a daily operational inspection to the more inclusive annual and biannual inspections. Daily operational inspections require a visual inspection of the unit’s condition and an operational check to ensure all functions are operating safely and within the manufacturer’s specifications.
 Inspections at the required hourly, monthly and quarterly intervals need some additional work to be performed. These inspections may also include changing engine fluids, filters (oil, fuel, air) and checking or replenishing fluid levels such as hydraulic oil and other lubricating fluids. Annual inspections go into greater detail, including the above-mentioned inspections and often require the changing and replenishing of all lubricating fluids on the unit, all filters and retorqueing of certain fasteners. Adjustments and operational checks of each function are often included in this inspection.
Biannual inspections are of the greatest detail, including all of the above-mentioned inspections and any additionally required inspections or adjustments required by the manufacturer. These inspections may need to be accelerated if the unit’s operating in conditions such as refineries and construction sites. In addition to the inspection process, keeping up with the repairs that may be required due to usage, damage and abuse will extend the life of your unit. Caring for the overall appearance of your unit will also extend its life:
- Keep the paint in good condition to help eliminate the possibility of rust and corrosion.
- Make certain that all operational and safety decals are in place and legible. This will assist operators and help prevent damage and accidents.
- Keep all of the operational functions in adjustment, operating safely and within manufacturer’s specifications. This will alert you to potential issues that could arise, leading to additional cost and the possibility of additional damage to components.
- You should annually (or more frequently) check for service bulletins and upgrades to ensure your fleet is up to the manufacturer’s standards.
Over the next six pages is a series of articles aimed at taking pride in ownership by performing proper preventive maintenance and inspections that will bring many years of reliable operation, in addition to providing a higher resale value should you decide to sell or update your fleet. These articles are penned by the leading suppliers of the equipment industry (including my personal favorite Terex), and provide information to establish a solid foundation for preventive maintenance and inspection programs for compact equipment.
Bob Bartley is the director of technical services at Terex AWP, based in Redmond, Wash.
Fluid Mechanics
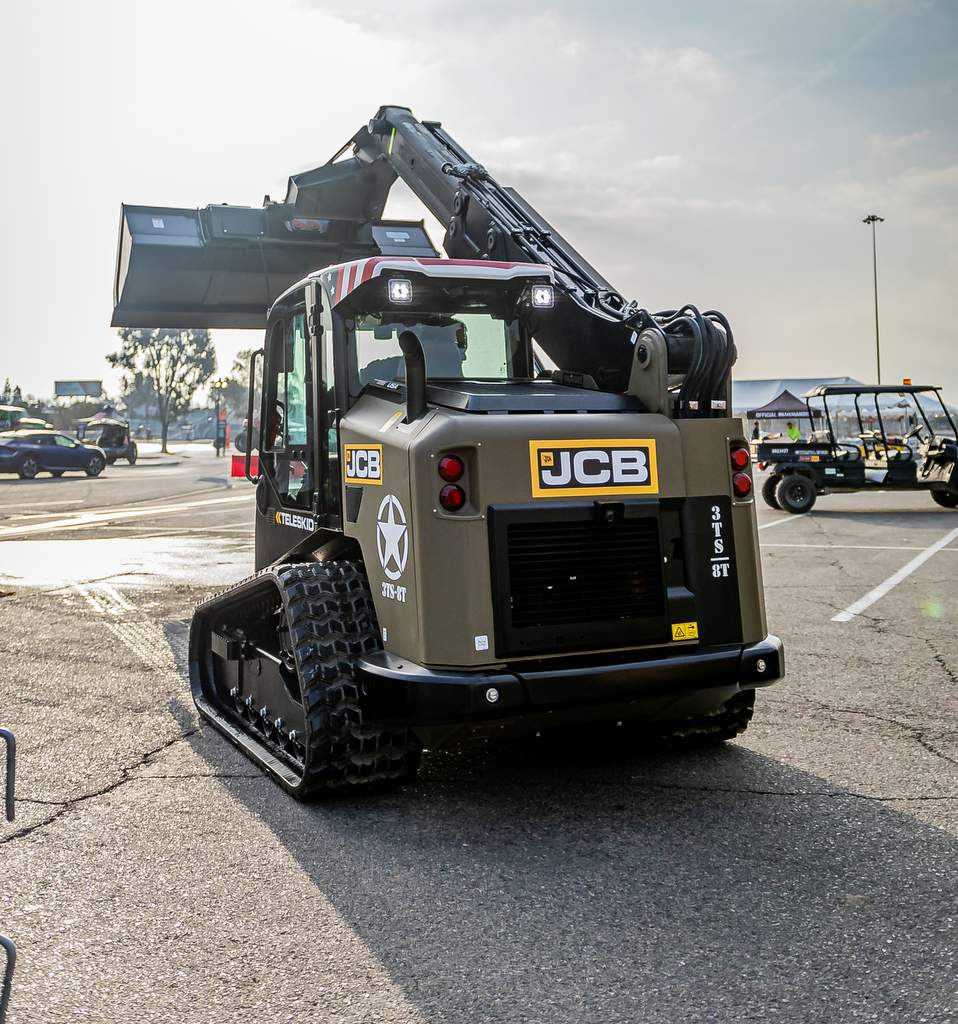
The Experts at JCB Design a Fluid and Oil Analysis Program for Your Skid Steer
By Lynette Von Minden
 For owners and operators of skid steer loaders, machine downtime can lead to a significant and expensive loss of productivity. However, in addition to performing regularly scheduled maintenance, there is something that skid steer loader owners and operators can do to help avoid this situation — conduct fluid analysis programs.
A fluid analysis program involves taking fluid samples from the engine, hydraulics, transmissions, differentials and gearboxes and sending them into a lab for analysis. By doing so, owners can determine the fluid condition and the internal condition of their machines. This type of analysis also identifies component wear and contamination in engines, transmissions, hydraulic systems, final drives and other components.
“Once owners know the condition of their machine’s components and fluids, they have the knowledge necessary to safely extend drain intervals or identify minor problems before they become major failures,” says Mike Werner, vice president of customer support operations for JCB North America. “In this way, fluid analysis programs can extend equipment life, maximizing an asset’s reliability and increasing its resale value.”
According to Werner, here’s a step-by-step guide to getting started:
- Determine what fluids you will be sampling and your correct sampling interval. You can test fluids from your engine, hydraulics/transmission or the differential/gearbox. It’s not imperative to test all three types of fluids, but doing so will present you with a far clearer picture of your machine’s overall condition. The appropriate sampling intervals for these components are:
-
Engines: 250 hours
Hydraulics/Transmissions: 250 to 500 hours
Differentials/Gearboxes: 750 hours
- Find a reliable and affordable laboratory to analyze your machine’s fluid samples, a process also known as spectoanalysis. It’s best to use a laboratory that is familiar with the testing of heavy equipment fluids, and if possible, ISO 17025 A2LA accredited. Explain the purpose of your testing program and find out about any specific testing protocols and procedures the lab may have. Request a sample report and ensure that you know how to read and interpret it.
Laboratories that perform this type of testing will typically send you a testing kit that contains small, sterile jars to hold the fluid samples, a padded envelope to use when shipping the sample to the lab and labels that you must fill out and adhere to the sample jars. The information you’ll fill in on this label includes unit identification, type of component and position, time on both the fluid and the unit and whether fluid has been added or changed.
- Start the program with a clear new oil sample. Some fossil fuel oils actually contain higher levels of certain particulates right from the oil refinery. This will become your base point. Continue to use the same oil brand and type to determine that elevations in a particular element are from components and not the oil itself.
- Use the following sampling methods for these components:
-
Engines: Take the sample with a vacuum pump through the dipstick retaining tube or sampling valve installed in the filter return.
Hydraulics/Transmissions: Take a sample with a vacuum pump through the oil fill port of the system reservoir at mid-level.
Differentials/Gearboxes: Take a sample with a vacuum pump through the oil level plug or dipstick retaining tube.
- After you’ve taken the fluid samples and sealed them within the appropriately labeled jars, enclose them in the padded, self-addressed envelope provided by your laboratory and ship them off for analysis.
- When the lab notifies you that your test results are complete, be sure to examine them immediately. There’s no point in having a fluid analysis program unless you’re really using it to monitor the condition of your fluids and your skid steer loader.
Lynette Von Minden is a public relations expert at Swanson Russell, based in Lincoln, Neb.
Preventive Programming
Use Fluid Analysis to Avoid Expensive Compact Equipment Repairs
By Michael Jerred
 Diesel engines used today in compact equipment are becoming more advanced to meet new emissions requirements. As these requirements become more stringent, engine design changes and use of technically advanced intake, exhaust and fuel systems are required to help meet the new emissions regulations. Even though the engines may be compact in size to fit the application, they are not so compact in cost of repair if needed. With that in mind, a compact equipment owner can save thousands of dollars in repairs and prevent costly downtime by paying attention to the normal maintenance schedules provided by the manufacturer and by doing a few other simple and cost-effective preventive inspections.
Every machine and engine operator’s manual have recommended maintenance schedules. In addition, many have a simple maintenance log to record repairs and maintenance. In most cases, the maintenance schedules are general in nature and not optimized for specific operating conditions. This is particularly important to understand when looking at engine oil change intervals. Operators change oils at intervals ranging from 100 to 500 hours. Why? Most likely it is something they have always done or that is what the manual says. Certainly one would not recommend a change interval longer than the maximum recommended by the operations manual, but is the recommended interval good enough? How do you know?
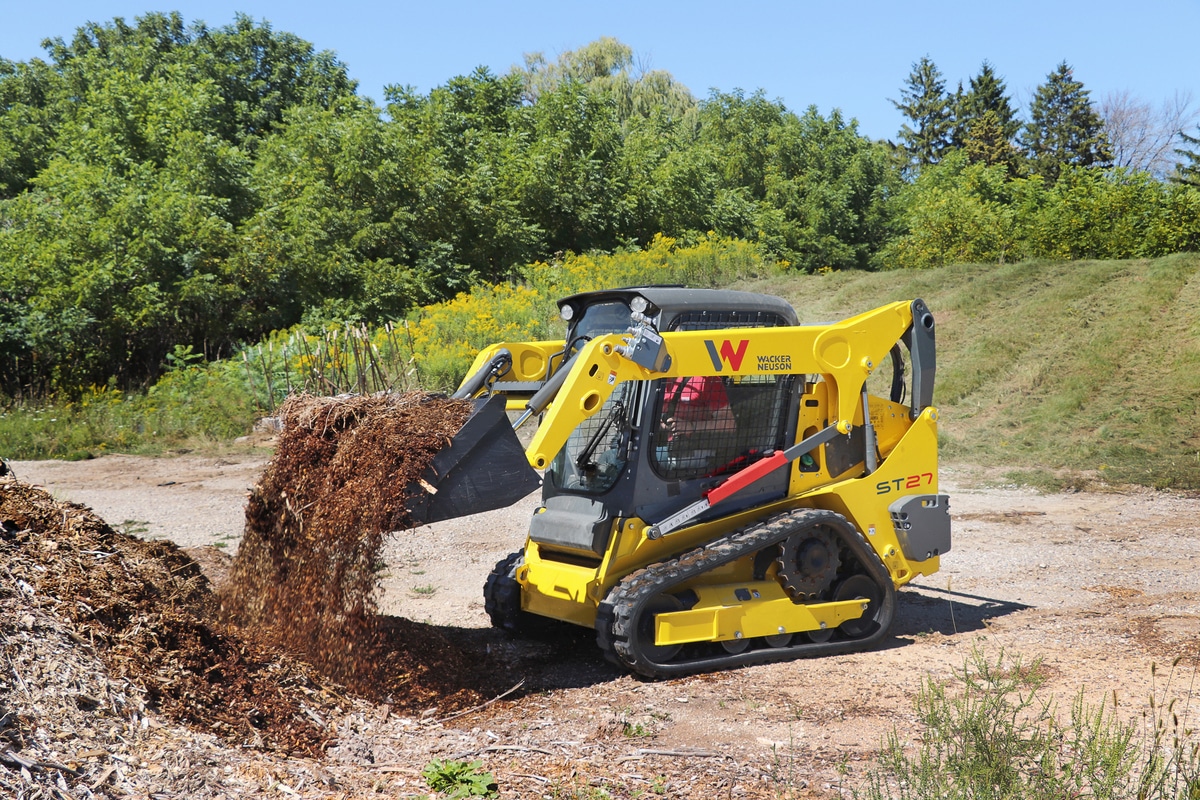
One of the best and least expensive tools to help determine oil change frequency and engine health is consistent use of a fluid analysis program. Gehl Co. recently introduced a fluid analysis program to provide Gehl and Mustang dealers easy access to a full range of fluid analysis tools to better serve their customers. Overall, consistent use of fluid analysis programs to monitor the health of the fluids in the engine, hydraulic, coolant and fuel systems is an excellent way to help prevent failures or catch excessive wear early in the process to reduce operating and repair costs and minimize downtime.
Michael Jerred is the Gehl Co. customer satisfaction manager, based in Madison, S.D.
The ABCs of Skid Steer Oil
Bobcat Talks Oil Essentials for the Ultimate Compact Tool Carrier
By Christopher Weishaar
 Just as demanding physical activity requires the human body to be maintained in top shape, today’s engines and applications for skid steer loaders requires a well-executed maintenance schedule to keep the machine running at peak performance. While hydration with water is important for athletes to keep up the pace of the physical tests they put their bodies through, skid steer loaders need the proper oils to keep everything clean, cool and safe.
“Today’s engines run hotter and burn cleaner,” says Mike Fitzgerald, Bobcat loader product specialist. “New machines have faster cycle times and higher pressure hydraulic systems, yet customers expect components to live longer, so the oils you use today are more important than in the past.”
The first place to start with any oil maintenance program is the manufacturer’s operation and maintenance manual. Fitzgerald notes that each brand of machine is different and is built with different components, which means the recommended interval for maintenance may be different. “A properly followed maintenance schedule can enhance the life of the machine and provide maximum longevity,” Fitzgerald says.
The importance of oil in a machine is multifaceted, including protecting critical parts, keeping the system clean, transmitting power, removing heat and resisting acid formation. Some of the major oils in a skid steer loader include:
- Hydraulic Oil — The hydraulic system is the heart of the machine, and the oil transmits power through the system.
- Engine Oil — The oil protects the engine components and transfers heat away.
- Hydrostatic Oil — Like hydraulic oil, the hydrostatic oil is used in the transferring of power.
- Transmission and Chain Case Oil — This oil not only lubricates parts, but also cleans.
While following the manufacturer’s recommended timeline for service intervals is important, there are some conditions that may affect the service interval. These include the regular use of high-flow hydraulics with attachments or operating in dusty or high-load applications. As with the service intervals, a manufacturer’s recommendation on oil should be used. The key things to look for are oil viscosity and the API service classification. Again, some situations may change the type of oil used, such as using a higher or lower viscosity in extreme cold or hot temperatures.
Another thing to consider is synthetic and biodegradable oils. For example, Bobcat is introducing a biodegradable oil approved for use in machines manufactured after January 2005. Oils like these are being introduced into the marketplace because of customer demand as federal, state and local governments are setting environmental-related restrictions on projects. If you determine the need for such an oil, check with your local dealership as they will know the availability of oils for your machine and the proper flushing procedures to switch to the new oil.
While some of today’s oils and filters may be more expensive than in years past, the added benefit of better oil combined with cleaner engine technology means longer-lasting machine components and machines that run with improved performance and efficiency. But a solid maintenance program is still the key to keep your machines running at peak efficiency.
Christopher Weishaar is a technical writer for Two Rivers Marketing, based in Des Moines, Iowa.
Avoiding Detractors
Three Tips from Terex on Tracking Undercarriage Wear on a Mini Ex
By Amber Reed
Because the undercarriage on your compact excavator works as a system, wear is unavoidable. “All of an undercarriage’s moving components — sprockets, idlers, chain and pads — are wear items,” says Jesus Santos, product specialist, Terex Construction Americas. “Did you know that the undercarriage is the most costly part of your excavator? Because these components are costly to replace and time consuming to install, you should protect your investment by taking the time to inspect and maintain your compact excavator daily. It can make up almost 20 percent of your machine’s purchase price and nearly 50 percent of its maintenance cost. Such valuable components should never be neglected.”
 Tip #1: Check Track Tension
One way to avoid premature or excessive wear of your undercarriage is to make sure that your compact excavator’s track chain is adjusted for correct tension. The components of your compact excavator’s undercarriage are designed to wear evenly. If some components wear more quickly than others, it can affect the productivity and wear of all the components.
“Loose tracks can de-track and can increase wear,” says Santos, “so be sure to check the track chain for proper tensioning every 10 to 15 hours of use, or at least every day. Tracks that are too tight can cause excessive roller and idler wear and can tear the tracks.”
Santos recommends the best way to inspect the tension of the track chain is to raise the machine — in this position, the track should sag enough to leave about 10 to 15 mm of free space under the center track roller. “For your excavator’s correct track inspection and tensioning procedures, always refer to the operator’s manual for the manufacturer’s recommended guidelines,” says Santos.
Tip #2: Clean and Covered
Jobsite debris, like mud, snow and rocks, packed around the undercarriage also leads to faster component wear. Compact excavator manufacturers, including Terex, recommend that the undercarriage be inspected, cleaned and greased daily.
“At the end of each workday, knock away any debris that’s accumulated in the tracks, and then while the machine is still warm, wash it down to get rid of any remaining materials that could cause corrosion or contamination,” says Santos. The end-of-day, wash-down process is a good time to remove embedded foreign objects from the tracks and to lubricate all moving parts. “The daily wash down is also an excellent time to look for any loose, worn, cracked, bent, broken or missing components. Replace these items immediately,” Santos finishes.
If your compact excavator is going to be parked for a period of time, particularly in the extreme heat, it is important to cover the tracks or to exercise the machine at least once a week. This prevents water and condensation from building up in the undercarriage and rotting the components.
Tip #3: Train Every Operator
Your excavator operators have more influence on the life and longevity of an undercarriage system than all of the manufacturer’s best efforts. “The operation and upkeep of your compact excavator,” according to Santos, “directly impacts your repair time and downtime costs.”
Santos recommends that each operator be taught the correct way to drive your compact excavator, understanding what they can do to keep it running in top form. For example, operating at higher speeds can cause more wear on the undercarriage, so drivers should apply the slowest possible operating speed for the job.
Also, says Santos, operators need to alternate their turning directions during the day — continuous turning to the same side can cause asymmetrical and accelerated wear. “Quick or sharp turns ought to be avoided entirely, especially when operating in rocky conditions,” adds Santos.
Operators should also learn to control track spinning when filling the bucket because unnecessary spinning also accelerates wear and causes cuts in the tracks. Operators also need to be cautious when driving over edges, curbs or other sharp angles to prevent breaks in the tracks. “It is always best to use boards, beams or small ramps when driving on or off any angle,” says Santos. Finally, operators must learn to plan the machine’s movements with the terrain, not against it, to reduce wear.
Amber Reed is a technical writer for Performance Marketing, based in West Des Moines, Iowa.
Good Maintenance Pays
Save Money on Replacement Rubber Tracks Through Simple Maintenance Habits
By Raymond Oh
 It’s every contractor’s nightmare to have a machine become inoperative unexpectedly at the jobsite while working. Operating failure can be especially painful with expensive parts such as rubber tracks that have to be replaced immediately when they fail. For parts like rubber tracks, the price of replacement can be more than just the cost of the parts. Additional costs on the delivery, pick up and labor of dismantling and installing cannot be overlooked when considering the total price of the rubber track you need. Buying a quality track is also important. Workers usually can tell whether their tracks were worth the money just by operating the machine for a while. There are also some ways to reduce your expenses for rubber tracks. With proper maintenance, operators can significantly increase the general life of the tracks, ultimately reducing the recurring costs of replacements.
Proper maintenance is not rocket science; any machine owner-operator can easily perform these tasks within a few short hours with little effort. For example, cleaning out any debris in the undercarriage of the machine with a water or air hose greatly reduces the chances of base cracks that lead to a split or tear. The rubber tracks should be washed to remove any debris that has worked its way in between the rubber track and the metal undercarriage components. This debris can gradually grind away the surface of the rubber track on the track roller side, exposing the embedded metals. Consequently, the embedded metals will corrode, resulting in their separation from the rubber body. This process may be accelerated in environments that are particularly corrosive, such as salty areas near the seashore, strongly acidic or alkali containing terrains and compost spread grounds. Cleaning out your undercarriage may only take about five minutes, but if done regularly, it can greatly improve the life of the tracks along with the replacement undercarriage components such as rollers, idlers and sprockets.
Extended rubber track life will reduce costs for the repairs and replacement of what is often an expensive and key component of compact equipment. Though rubber tracks are mainly designed for “compact” machines such as mini excavators and compact track loaders, tracks themselves can actually be not so compact on users’ eyes. A single rubber track for construction equipment can be as heavy as 1,500 lbs each, and even that is not the heaviest you will see in the field. Constant checkups and good maintaining habits will be cumbersome tasks, but a difference will be noticeable in the long run when it is done right.
Raymond Oh is a sales and marketing manager for DRB America Inc., based in Cerritos, Calif.
Inspection Insights — Cat Tackles the Basics for Used Filters
 If you don’t cut apart used oil filters for inspection, you’re missing an easy, inexpensive opportunity to check the health of your machine’s components — even before the oil-sample report is back from the lab. To inspect used filters, you’ll need a filter-cutting tool, which is relatively inexpensive and easy to use.
After cutting off the top of the filter canister, extract the filter media and place it on its side on an absorbent material. With a sharp utility knife, make a 6- to 8-in. cut along the bottom of a pleat, then repeat the process through another pleat about 1.5 in. from the first cut. Then, cut across the pleats between the two long cuts and extract the resulting rectangular-shaped section of filter media.
After wiping any debris from the jaws of a bench vice, wrap the filter-media sample in a clean shop cloth and use the vice to gently squeeze any remaining oil from the media. Remove the wrapped media sample from the vice, place it on a clean surface and remove the sample from the cloth.
Carefully inspect the cloth for debris, passing a magnet over both the cloth and along the top of the media sample to determine if any of the debris is ferrous material. Then, pull the media sample open to expose the pleats and inspect for metallic debris. Finding a few flakes of metallic-looking debris is common, but anything more than a few flakes is reason to contact your equipment dealer for a more thorough analysis of what you’ve found.
Walt Moore is a freelance editor based in Roselle, Ill.
Welder Power Protection
Advice from Miller and Kohler on Maintaining Your Welder Generator’s Gas Engine
By Mike Trinkner and Jeff Gruell
As the owner of a welding generator, the key to long life and proper maintenance is ritual. By getting into the habit of checking these items, your engine drive will deliver optimum performance for thousands of hours.
Oil Checks and Changes

Miller and Kohler recommend checking oil levels every eight hours and changing oil every 100 hours. Do not over- or under-fill. Over-filling reduces generator power and welding output and leads to fuel pump failure. Under-filling doesn’t allow it to cool properly, can lead to catastrophic engine failure and is considered owner neglect, which voids the warranty. Kohler recommends 10W-30 motor oil. If you work in extremely cold environments (0 degrees Fahrenheit or colder), use 5W-30 oil, as it circulates more easily during cold starts. Synthetic motor oil generally provides better protection of engine components, however mineral-based oil is recommended for the first 50 hours of engine break-in.
Change the Oil Filter
Kohler recommends changing your oil filter every 200 hours. If you don’t regularly change the filter, it becomes clogged with impurities that restrict oil flow. Always use OEM-mandated oil filters. Unapproved oil filters could have improper filtration media, which in extreme cases may lead to engine damage and void the warranty.
Fuel for Energy
Always use clean, fresh fuel. When fuel becomes stale, it creates varnish that gums up the carburetor. Problems caused by stale fuel aren’t covered under warranty. It also may not be the right seasonal blend. Gasoline’s formula changes throughout the year. Summer blends have a lower vapor pressure so the engine won’t vapor lock. Winter blends vaporize easier for better starting. While the ethanol-based fuel E85 is becoming widely available, never use E85 in carbureted engines. The ethanol corrodes the rubber, brass and aluminum fittings within the carburetor and will ruin the engine within 15 minutes.
Cold Weather
With the right viscosity oil, all Kohler Command engines are rated for starting at minus 20 F. The only winter maintenance item that might be necessary is an anti-icing kit. It solves problems with carburetor icing, which usually happens between 30 and 38 F with high humidity. The use of an isopropyl alcohol-based de-icer, mixed per the manufacturer’s recommendation, can help with carb icing problems by pulling condensation out of the fuel tank.
The Fuel Filter
The fuel filter should be replaced every 200 hours or any time that you’ve filled up the tank with a bad batch of gas. If the filter gets too dirty, it will restrict the amount of fuel that travels to the carburetor, which results in a “lean” air/fuel ratio. The lean ratio inevitably reduces the generator power available and lowers welding output.
Replace the Air Filter
Replace the air filter every 200 hours and more frequently if you work in extremely dirty and dusty environments. A dirty air filter prevents the proper amount of air from reaching the carburetor. As a result, the engine runs “rich” (too much fuel and not enough air), which fouls the spark plugs and reduces generator output and power at the arc.
Mike Trinkner is the engineering manager of power products group at Miller Electric Mfg. Co., based in Appleton, Wisc. Jeff Gruell is a staff engineer for the Application Engineering group at Kohler Engines, based in Kohler, Wis.

Comments are closed here.