Compact Telehandler Maintenance
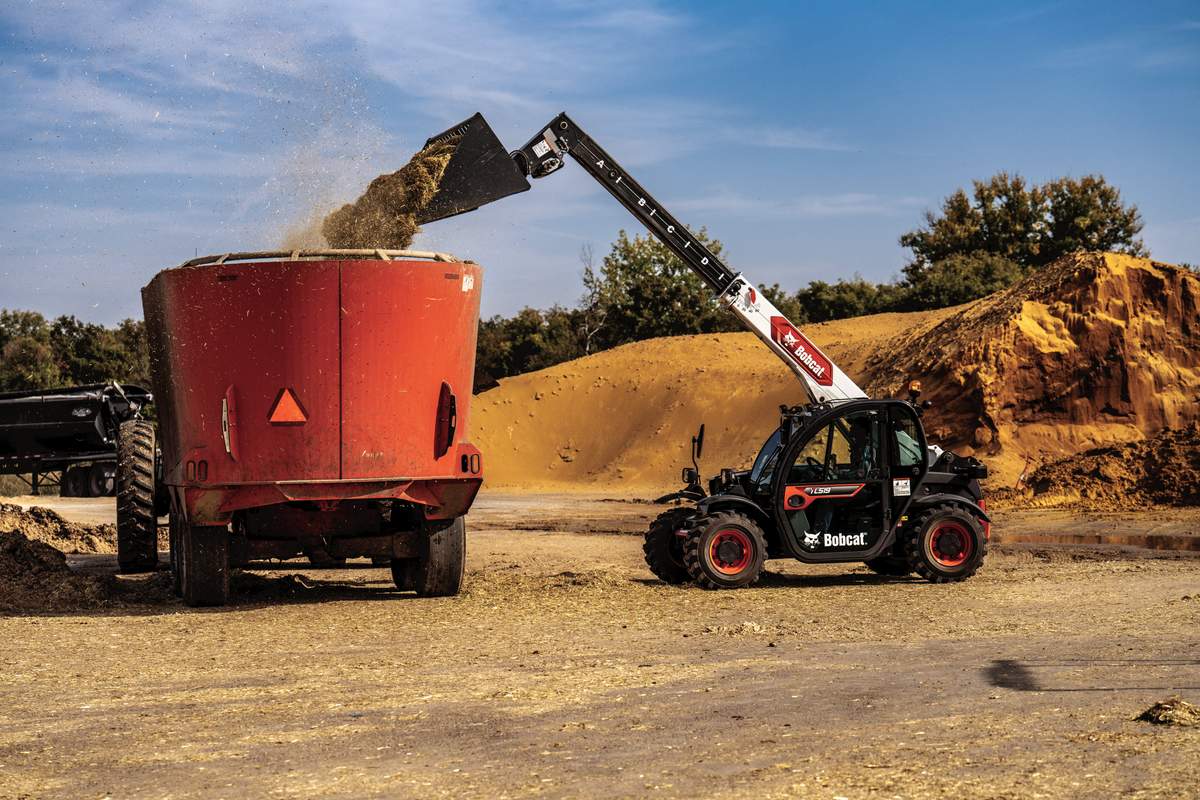
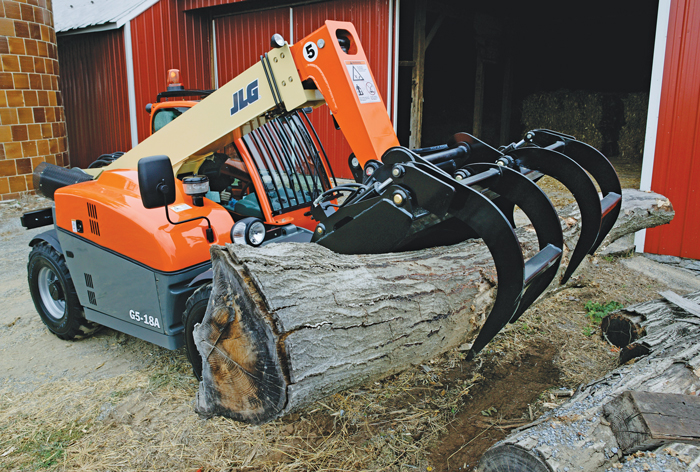 Compact telehandlers have become the workhorses of today’s congested jobsites, as their versatility has made them a favorite choice for situations where size is critical. From construction and landscaping to agriculture and material handling, compact telehandlers can maneuver into and around crowded work areas equipped with attachments, such as material or grapple buckets, cubing forks and lumber forks, making them an indispensable part of the modern fleet.
Because contractors heavily rely on these machines, maximizing their uptime is crucial. The best way to ensure your compact telehandler is ready for whatever the work day brings is to adopt a consistent maintenance routine — a combination of the manufacturer’s maintenance schedule and operating instructions for your well-trained operators.
For many equipment owners and operators, the repetitive nature of the maintenance routine — the walk-around, the warm-up and the pre-operational check — may cause them to skip steps that seem simple or unimportant. Yet it’s these very steps that can sometimes mean the difference between getting started and getting sidelined. To help you get the most out of maintenance, here’s a little refresher on some of the often-overlooked details.
The Walk-Around Inspection
A typical walk-around inspection of a compact telehandler includes approximately 20 check points. Begin at the same inspection point each time and work your way around the machine in the same sequence and direction. Completing the inspection in the same sequence will help ensure you don’t miss a checkpoint. At JLG (a global manufacturer of telehandlers), we instruct operators to begin at the boom sections and cylinders of the compact telehandler, but your inspection may go in a different order, depending on the manufacturer’s recommendations. Standing at the boom sections and cylinders, check the front, top, side and rear wear pads for grease and make sure pivot pins are secure and hydraulic hoses are not leaking.
Next, a look inside the battery compartment should reveal tight cables with no visible damage or corrosion, and the cover should be properly secured. Likewise, the engine compartment should contain drive belts in good condition, secure engine mounts and a proper engine cover. Inside the cab, the electrical instrumentation, including gauges, switches, joystick, foot controls, horn and seatbelt, should be operational. Outside, all tires should be properly inflated and secured with no loose or missing lug nuts, and tires should be inspected for worn tread, cuts or tears. Mirrors should be clean and undamaged, and the front and rear axles should display undamaged steer cylinders. Pivot pins should be secure and hydraulic hoses intact.
Regarding fluids, including fuel, brake, engine oil and coolant, before removing filler caps or fill plugs, wipe all dirt and grease away from the ports. If dirt enters these ports, it can severely reduce component life. Attachments and accessories should be installed according to the telehandler’s capacity chart. Operators should refer to the operation and safety manual for each part. Overall, always make sure there are no loose or missing parts, that parts are securely fastened and no leaks, cracks, corrosion or other damage are present.
The Warmup
During the warmup period, test the heater, defroster and windshield wiper for proper function. All lighting systems should be operational and mirrors should be adjusted for maximum visibility. Once the engine warms up, test each of the following: service brake and parking brake operation; forward and reverse travel; steering in both directions with the engine at low idle; horn and back-up alarm; all joystick functions. Ensure that all boom and attachment functions operate smoothly and correctly, and perform any additional checks per manufacturer’s instructions.
As stated earlier, many maintenance procedures are self-explanatory and routine, but the routine nature of these tasks is exactly why many operators need occasional reminders. Here are a few maintenance details worth regularly reviewing. Before performing service or maintenance on the telehandler, follow the shut-down procedure and make sure the telehandler is level to get accurate fluid readings. Clean lubrication fittings before lubricating. After greasing the telehandler, cycle all functions several times to distribute the lubricant. This procedure should be performed without the attachment installed. Apply a light coating of engine oil to all linkage pivot points, following the lubrication schedule provided by the manufacturer, and adjust for more extreme conditions. Check all levels when the lubricant is cool and use a funnel with a hose or flexible tube for best results.
 Fluids
 Fluids
All fluid levels should be checked after performing the shutdown procedure. Checking the fuel gauge and adding fuel may seem like simple tasks, but don’t forget to replenish the fuel at the end of each work shift to minimize condensation in the tank. Don’t allow the machine to run out of fuel during operation. When draining the fuel/water separator, allow the water to drain into a glass until clear fuel is visible. Lastly, checking the engine oil in your telehandler is much the same as checking the engine oil in your car. Oil should appear on the dipstick between the full and add area. If needed, add oil to reach the full mark. This should always be done while the engine is cold.
Tires
For pneumatic tires, when any cut, rip or tear is discovered that exposes a sidewall or tread area cords in the tire, the telehandler must be removed from service immediately and the tire or tire assembly must be replaced. Polyurethane foam-filled tires must be replaced if a smooth, even cut through the cord plies exceeds 3 in. in total length, any tears or rips in the cord plies exceed 1 in. or any puncture exceeds 1 in. in diameter. If a tire is damaged but within the noted criteria, the tire must be inspected daily to ensure the damage does not exceed the allowable amount.
Any replacement tires must be of equal or greater ply/load rating and size than the original tires. Tread contact width, wheel diameter, width and offset dimensions must also be equal to the original. All tires must also be approved for the intended application. This includes inflation pressure and maximum tire load. Foam-filled or ballast tires must not be replaced with pneumatic tires unless approved by the manufacturer. Tire sizes vary from brand to brand, so when selecting and installing replacement tires, be sure both the tires and the axle are the same. Telehandler tire rims are designed for stability, and size changes, such as rim width, center piece location and diameter, will compromise safety.
If your telehandler is equipped with directional tire assemblies, the assemblies must be installed with the directional arrows facing forward travel. Lug nuts should be tightened in an alternating pattern according to their prescribed torque value to prevent loose wheels, broken studs and possible separation of the wheel from the axle.
Air Filter, Brake Fluid and Engine Coolant
When performing an element change, care must be taken not to damage the element. An inner safety element should never be washed or reused. Always install a new element.
Engine coolant levels vary depending on the temperature of the engine. When the coolant is hot, the tank should be one-half to three-quarters full. When the coolant is cool, the tank should be one-quarter to one-half full. Add brake fluid as needed; all other brake system work must be performed by qualified personnel.