Nothing Plane About Them
 As the seasons change and the weather and traffic take their toll on roads, construction crews get overloaded trying to keep up with small surface repairs. When re-working cracks, fissures and gaping holes in holiday gridlock, contractors are forced to find a maneuverable solution to one-and-run road repairs, pesky potholes and pavement restoration.
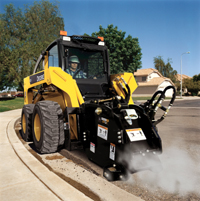
That solution often comes in the form of a cold planer attachment for a skid steer or compact track loader. Cold planer attachments can tackle small-scale road repairs at the busiest times of the year, removing layers of asphalt and concrete for street resurfacing and repair work, grinding or milling away material to make way for new avenues of travel. This mill-minded attachment not only has potential to complete numerous road projects, but can also level around manholes or railroad tracks, repair frost heaves, taper for drainage and cut utility trenches.
“The term cold planer comes from the fact that the operator does not have to heat up the asphalt before milling,” explains Bob Bethards, OEM account manager for Paladin Brands, an attachment manufacturer specializing in light and heavy construction, utility, forestry, demolition, scrap and recycling applications. “This allows for a quicker cycle time when trimming behind a full-size, self-propelled unit. You are able to engage the area and drop the planer into the asphalt or concrete and begin milling.”
A cold planer attachment not only makes your skid steer or compact track loader more flexible, it makes your road repair operations more agile, with the ability to get in and out of tight situations quickly to repair and then roll onto the next jobsite. Before buyers can pick the perfect cold planer, they should understand what makes the attachment work the way it does. Knowing the pieces and parts of the planer will assist the operator in utilizing it correctly, as well as purchasing the ideal milling implement for their crews and construction projects.
Anatomy of a Planer
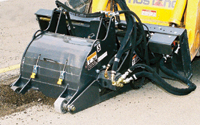
In order to detail the many parts of a cold planer, you must first dissect it. The majority of cold planer attachments in the industry come with a black metal domed drum that spins iron picks to grind up asphalt or concrete.
“The drum’s shaft is spun by a hydraulic motor powered by the hydraulics of the host skid steer,” explains Kelly Guthrie, marketing director for Coneqtec-Universal, a manufacturer of cold planers, stump grinders and other attachments specific to concrete and asphalt applications. “For direct drive motor configurations, the drum shaft is basically an extension of the motor shaft. For planetary reduction systems, the drum’s shaft is turned by gears that are turned by a smaller motor.”
Cold planer sizes are categorized by drum width. Sizes can range from 12 to 60 in., depending on the size of the host machine and whether or not it is a standard- or high-flow hydraulic unit.
There are two types of drums on cold planers for most tool carriers — open and closed. An open drum consists of solid steel wheel plates that are welded to the center shaft of the drum. The picks, or teeth, are fused onto the plates. Open drums supply a knife-like grinding, breaking the surface into larger chunks before restoration. These pieces fall through the plates and are left behind in the planer’s path. The open drum is patented by Coneqtec-Universal and is only available from the company.
“Out of the five or so American planer manufacturers, the open drums are only available on Coneqtec-Universal machines” says Guthrie.
Closed drums, on the other hand, are made from a single tube that has steel plates and picks joined directly to the tube. With closed drums, the material is ground up inside the unit, creating a fine powder rather than large pieces. Although both styles of drums have their particular advantages, closed drums are considered the most popular among manufacturers.
“Ninety-nine percent of all planer attachment companies prefer the structural strength and weight that the closed drum design provides,” says Chris Zanetis, president of Zanetis Power Attachments, a skid steer attachment manufacturer.
Most cold planers attach to skid steers and track loaders through a universal quick-attach system. Before a skid steer or track loader operator can gear up and begin to use a cold planer, certain precautions and guidelines should be addressed. The gpm and operational speed of the machine must be considered and calculated to ensure you’re getting the most out of the planer attachment. Not to mention, there are simple rules to live by when adding a cold planer to any piece of machinery.
The gpm of hydraulic flow needed to operate a skid steer with a cold planer is dependent on the hydraulic horsepower of the machine. Skid steers with low- or standard-flow hydraulic horsepower need to operate at 15 to 25 gpm to properly use the planer. A high-flow machine requires 25 to 42 gpm to utilize the planer correctly.
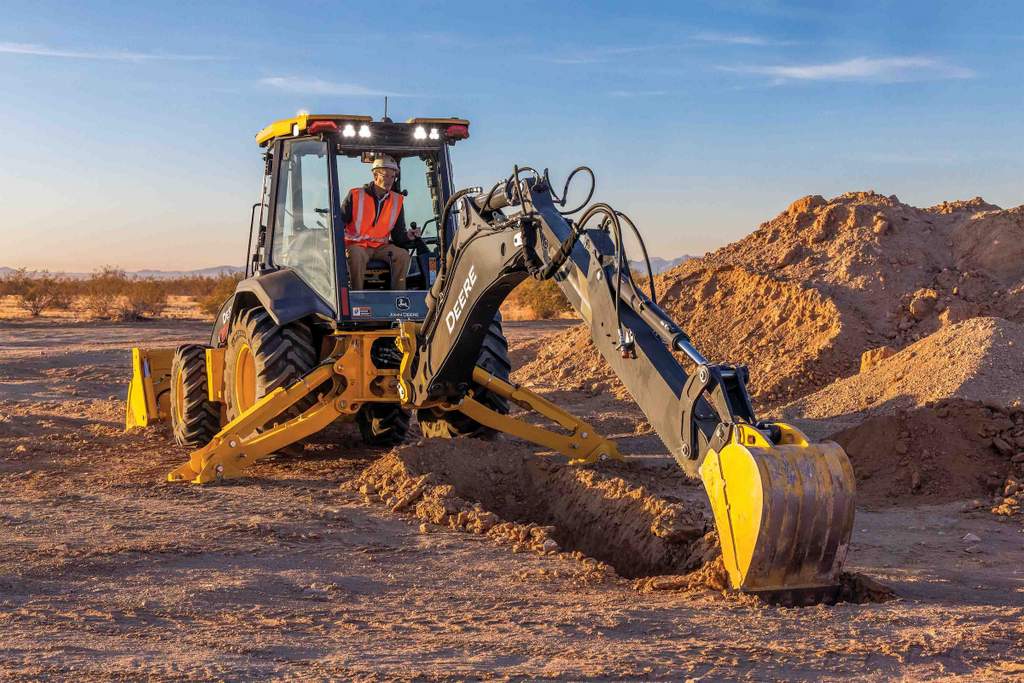
The most common machine to use a cold planer on is a skid steer, however, they can also be paired with compact track loaders, compact wheel loaders and backhoes. Depending on the size and manufacturer of the cold planer, the attachment’s cost can range from $6,000 to $26,000.
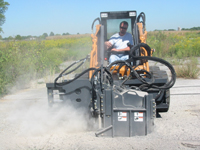
Water Works
 For increased productivity, a water kit can be added to a cold planer attachment. Water kits generally consist of a large tank that is filled with liquid and a hose that connects the tank to a spray bar on the attachment. Water kits can extend the usefulness of the planer’s picks and keep the jobsite free of dust and flying debris.
“For planers, the two main advantages of a water kit are cleaner picks and reduced dust,” says Guthrie. “Keeping the picks clean and allowing them to rotate will lead to faster milling and fewer pick replacements.”
Through using a water kit and keeping picks clean, the overall life of the picks can be lengthened. “The addition of water to the cutting area may increase tooth life by as much as 30 percent,” explains Zanetis. “The water acts as a lubricant between the carbide on the tooth or pick and the material being cut.”
As for dust, the water kit sprays a fine mist over the area that is being worked on, knocking the dust to the ground rather than out in the surrounding public. This increases visibility for both the operator and crew, as well as increases the life of the machine’s filter. Water kits range from 35 to 55 gal and can cost anywhere from $500 to $1,200.
Besides a water kit, there are other options operators can add to a cold planer to increase its productivity. Narrow cutting drums are available for use in specific applications such as slot cutting for patchwork or installing traffic signal loops. Different styles of picks are on the market to utilize when dealing with specific types of pavements. Zanetis also offers an exclusive lateral milling system, which allows the operator to rotate the milling drum 90 degrees, making the cut laterally in front of the loader. The option is useful for cutting bevel or butt joints prior to overlay in front of garages, where the concrete apron meets the asphalt driveway. Check with each OEM for similarly unique options when shopping around.
Optimal Operation
Once you fit the right size cold planer to the specifications for your skid steer or track loader carrier, correct operation and maintenance is essential for a long life of milling. Operational speed must be determined by the type of material that’s being cut, the depth of the cut and the power of the loader. When working with either asphalt or concrete, the speed will differ between the two.
Since concrete is a stronger and thicker material, the speed will be much slower. Experimentation and simple considerations will help an operator ultimately decide the proper speed. By taking the job at hand into consideration, as well as the depth of the cut and density, operators should determine a proper speed without stalling or overheating the machine, says Doug Laufenberg, John Deere’s product marketing manager for attachments and compact wheel loaders.
“Set the planer on the ground, with the drum raised up so it’s not engaged,” says Laufenberg. “Then turn the hydraulics on, slowly lowering the drum into the material. After making sure the engine is at full throttle, with hydraulics flowing, the operator should proceed slowly and drive forward. By taking their time, operators can complete the job effectively without damaging the cold planer attachment.”
Operators need to ease the cold planer into the cuts. By doing so, the operator can avoid damaging the planer from jumping right into the project. Taking the cuts slowly will allow the planer to do its job much better and resist wearing longer. Like any piece of equipment or machinery, cold planers also face certain limitations. The choice of machine, depth of cut and density of the material being cut are all factors to consider.
“Even for a strong skid steer, large jobs involving deep concrete removal are going to present a challenge,” adds Guthrie.
Prior to taking a cold planer out on the job, there are some operational recommendations for using the attachment efficiently without damaging the implement or application. One of the main tips is to keep the picks of the planer clean and able to rotate freely, allowing the attachment to work properly.
 “If the picks are clean and allowed to rotate, they will self sharpen while milling,” says Guthrie. “If they are stuck, they will grind down to dull stumps.”
While cold planers are generally low-maintenance machines, they do require simple checks. The picks on the drums must be checked frequently. Laufenberg suggests checking the picks twice a day to be sure that they remain free and can properly rotate. The picks can be pulled out with a specialized tool supplied with the attachment and cleaned when needed.
If the picks have reached their optimal usage, they can be replaced easily. Most picks have indicators on them to warn operators when replacement is necessary. Bethards suggests replacing the individual picks as they wear, noting that the outside ones tend to wear first. Replacement picks can be purchased for $5 to $15 per pick.
Additional maintenance includes a visual inspection of the attachment’s hosing and wiring, according to Zanetis. If any wear is present, the operator should consider immediate repair to prevent any further damage.
When the operator is ready to store the planer for the season or until next use, there are a couple guidelines to consider. The attachment should be stored on a hard surface and the drum should be retracted all the way and not in dirt or mud, says Laufenberg.
Zanetis also suggests that an overview of all the planer’s components should be completed and the repairs necessary for the next season are recommended before storing the attachment. Plus, operators should consult the owner’s manual for detailed repair and maintenance processes.
Pam Stask is assistant editor of Compact Equipment.


Comments are closed here.